
ZenPhoto Uploader Documentation
Running ZenPhoto Uploader
Currently there are no packages of zpu for any linux systems and as such you will have to
download the source and run it manually. So download the source, make sure that
zpu.py is set to be executable. Then double click zpu.py and you should see the main window.
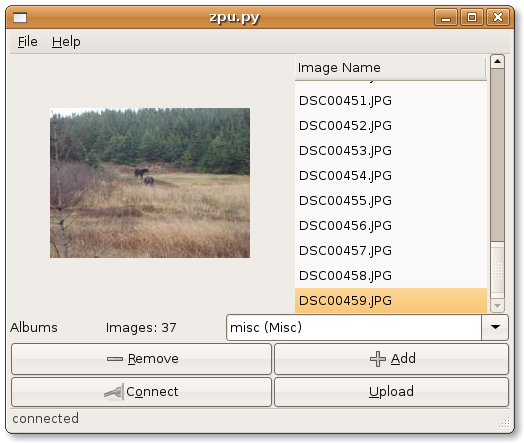
 As you can see, the main window is just blank with a few different areas. Just below the menu
on the left side is the image preview section. On the right of this is where the images that
are qued up are listed.
As you can see, the main window is just blank with a few different areas. Just below the menu
on the left side is the image preview section. On the right of this is where the images that
are qued up are listed.
Below the image que is a drop down box that shows the photo albums that can be selected to upload your images. To see the list of photo albums you must first connect to you ZenPhoto site.
Preferences
However, before you can connect you must set up your preferences. To do this click the "File" menu
item, then under file select "Preferences". So that would be File -> Preferences. This will load
the preferences window.
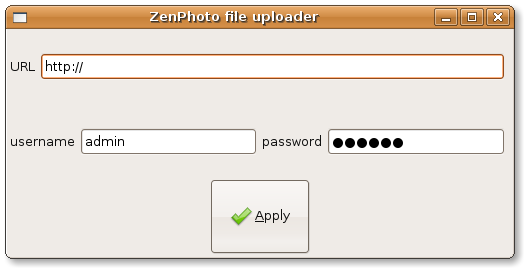
The url is the address you enter in your web browser to view your photo album. The username and password are the ones you use if you were logging in using a web browser. Once entered, hit the Apply button for the preferences to be saved.
Now that your site preferences have been entered you can connect to your ZenPhoto site by clicking the "Connect" button. When you are connect you can select a photo album that you wish to upload your photos to. Or if you wish you can create a new photo album by typing it in the photo album list and pushing enter on your keyboard.
Uploading
Project Web Hosted by
Here is zpu connected to a ZenPhoto site with an album selected. It
also has photos added and ready to be uploaded.
 To upload these files you only have to click the upload button. If you are not connected
or you do not have an album selected you will be given given a warning message and asked to
connect or select an album.
To upload these files you only have to click the upload button. If you are not connected
or you do not have an album selected you will be given given a warning message and asked to
connect or select an album.
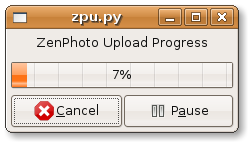
While uploading ZPU shows the progress with a progressbar. If you wish
you can pause or cancel the upload. However if click the pause or cancel button, they
will not take effect until the current photo has finished uploading.
11 Jan 2009 - Peter Gill
Project Web Hosted by
© zpu
· Designed by Alexandre Joseph